All Posts By

Angie

DIY

Hints for Creating Realistic Fictional Characters

10/05/2011

Fictional characters are mysterious beings. They have no real life but to us, they can be very real. People talk about them as if they were real and the things they did actually happened. To make a character that will live in the imaginations of other people, they first need to mean a lot to you as their creator. It’s true that a great character is what keeps a story going (and keeps you reading) so if you want to tell a memorable story, you will need to think up a great character. How do you do that?

Combine things you love to make a character you care about. If you’re interested in the Victorian era, maybe your hero/heroine is from this age in history? Be prepared to do some research to make your character believable. If you’re into science fiction or fantasy, you will have more creative freedom, but you will need to do some “world building”, and create your own setting around your character.

Name your character. The name of your character is more important than you might initially think. It gives your reader the very first impression of their age, personality and where, or when, they are from. A character that goes by a nickname like “Chip” or “Bruiser” already gives you a pretty clear idea of what they’re like.

Give them physical characteristics. Not only looks like eye color or height, but individual mannerisms, how they move and how they talk. Look at real life examples that you’ve noticed in other people. Maybe they overuse certain words or phrases or maybe they walk with a shuffle?

What are their strengths? Memorable characters have a lot of inner strength, a saving grace or a talent or two. Make your characters determined in the face of opposition, sad but still strong when they feel unloved. Give them a sense of humor or a need to help others.

What are their shadows? To understand shadows, it helps to look at yourself and the not-so-lovely things about your personality. Don’t make your character a carbon copy of yourself or someone else, but it helps to build ideas from real life. What are your character’s shortcomings and include some quirks. Its important to make your characters saving grace/s outweigh their shadow… unless you’re coming up with a villain. Still they need some part of their personality, a very small one, to be sympathetic.

Give your character loved ones and foes. Most of the time, your story wouldn’t be much without at least a few other characters. Give them a best friend, a mentor, an ex that dragged them through the mud, someone that stands in the way of their goals, or a love interest. These other characters should have a great influence on your main character.

How will they evolve? No character should stay the same throughout the course of a story. Your hero or heroine needs to have learned something and changed for the better, even after you put them through hell.
DIY

How to Write a Love Poem

02/24/2011

Expressing strong emotions through poetry will never go out of style, and even if it does, who cares? It’s all about making someone feel as special and beautiful as you see them, as they truly are. Want to know a secret? You don’t need to have any kind of talent to write a poem, just say what you feel! The best poems have come about when someone was feeling something intense, especially the adoration for another person. If you don’t know how to begin, here are a few techniques and hints.

Do Some Free-writing

Put a picture of your loved one in front of you, or just sit somewhere where you won’t be disturbed for a while and think about them. Start writing down everything that pops into your head, without worrying
that it sounds silly. It won’t look or sound like a poem yet, and that’s okay—you’re getting your thoughts and feelings down in words. It also helps to get in “the mood” by lighting a few candles and putting on some music (just be sure you don’t subconsciously copy some of the lyrics to “Need You Now” or something!)

Take Your Time

You may or may not write your love poem in one sitting, so take it easy and don’t push yourself. If you rush, it might not sound as good as if you took a couple of days or weeks to let it come to you. Keep a notebook or your phone on you so you jot or type down whatever pops into your head that might sound good. Remember, this is something you will use to impress the one you adore, so take your time!

Find the “Beat”

You don’t need to write a sonnet full of “thees” and “haths” or even something that rhymes. Most poetry does have a “beat”, however, which is what distinguishes it from prose. Read some good love poems to get a feel for the beat of poetry, and all the different ways it can be written. Here is an example to get you started:

“i carry your heart with me” by E. E. Cummings

“i carry your heart with me(i carry it in
my heart)i am never without it(anywhere
i go you go,my dear; and whatever is done
by only me is your doing,my darling)
i fear
no fate(for you are my fate,my sweet)i want
no world(for beautiful you are my world,my true)
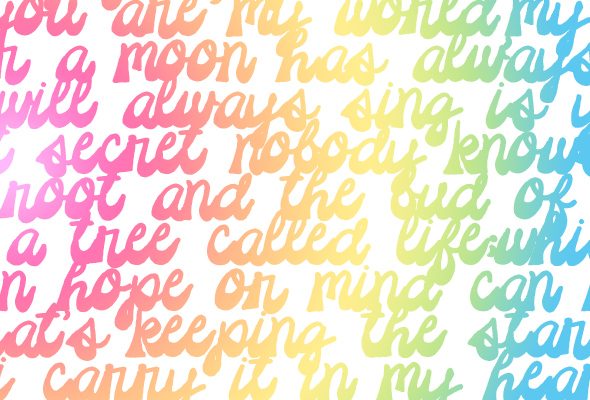
and it’s you are whatever a moon has always meant
and whatever a sun will always sing is you
here is the deepest secret nobody knows
(here is the root of the root and the bud of the bud
and the sky of the sky of a tree called life;which grows
higher than the soul can hope or mind can hide)
and this is the wonder that’s keeping the stars apart
i carry your heart(i carry it in my heart)”

The lines break it up so that there is a subtle rhythm as you read it. The poet also creates a beat inside the lines, and he repeats the main line of the poem to draw it together at the end. You can also distinguish a brief pause in a line with punctuation.

Here is an example of how a poet writes in rhyme and line-groupings called a “stanza”:

“Love at the lips was touch
As sweet as I could bear;
And once that seemed too much;
I lived on air”

~ From “To Earthward” by Robert Frost

Start experimenting and using some of your best lines from your free-writing and see what you can come up with.

Other Poetic Elements

Use some metaphors, similes, alliterations (All ambitious alligators adore alliterations!) and strong adjectives and verbs to paint a picture with your words. There are many other elements of poetry, such as allegories, personification and allusions. You could also just get literal and say what you feel, straight out! The poetic elements are just different tools to use.

This is just an intro to writing a good love poem—just to let you know that this is something anyone can do if they try. A love poem written from the heart is more valuable than a diamond ring and means so much more.

Crafts DIY

An Introduction to Colorful Art Mediums

01/12/2011

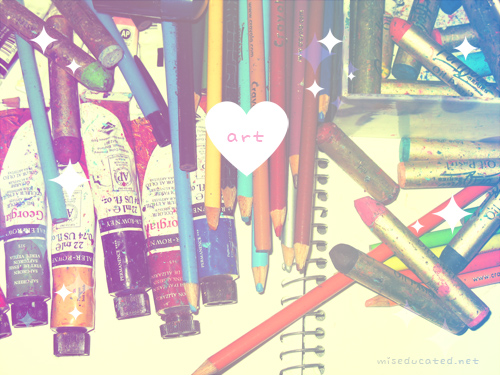
Sometimes getting your hands (your clothes, your surroundings…) messy and covered with a rainbow of colors is part of the art/crafting experience. I’ve gotten pretty familiar with several different mediums and I’ll give you a little run-down of why I love them and how I use them. If you haven’t used some of these before, I hope I can inspire you to try them! Note: I’m not an art expert, just a lover.

Oil Paints

Creamy, dreamy, vivid. I love working with oils because you can do so much blending (they dry slooowwly) and the colors are so rich. In school, we got to stretch and prime our own canvases ourselves. You can go to the art store and buy a canvas all ready to go, but you can get some satisfaction out of doing it all yourself. The only thing I didn’t like was the fact that you have to use turpentine to thin them and get the paint off of your brushes (it smells), but its a small price to pay.

Watercolor Paints

Of course, the first kind of paint I ever used. They aren’t just for kids though, as you can do so many different tricks with them! Since you can re-wet the paint once it is dry, you can blend existing colors. If you want to layer different colors without disturbing the layer underneath, you can use the next kind of paint on the list…

Acrylic Paints

I’m a big fan of acrylics. You can use them to paint many other things besides canvases. I’ve used them to customize wooden boxes, journals, jewelry, and I’ve painted wall murals with them. They dry very quickly and once they are dry, you can’t re-wet them like watercolors.

Oil Pastels

Messy, bright and beautifully blendable! These may be my favorite of all to work with. I keep some wet wipes handy to clean my fingers if I’m going from a dark color to a light color. I also like to use an in-between color to blend two other colors together. Blending them with my fingers is a lot of fun and makes me feel like I have even more control over the colors.

Colored pencils

They can do a lot in the way of blending, if you vary the pressure, use strokes in different angles and layer the colors gradually. The kind of paper you use will also determine how your picture looks. I like using paper with a smoother “tooth” (roughness), but if you like the gritty, textured look, a rougher tooth is the way to go. The more rough the paper, the more your colors with stick and, consequently, the sooner you will need to sharpen your pencils. Make sure your paper is acid-free so your artwork lasts longer!

Crafts DIY

Make Your Own Beads Out of Sand

08/21/2010

This perfect summer craft originates from the Bahamas and other tropical places where they are blessed with beautiful sandy beaches. Die-hard jewelry makers will use just about anything to make jewelry with, even the beach itself! If you are lucky enough to live by the beach and have access to any department store or craft store, then you can make your own sand beads from scratch. It is a bit time-consuming to roll and shape all of your own beads, but its worth it in the end when you have tons of colorful beads to make all the jewelry you want!

IMG_0842

You Need

Fine sand (from the beach or from the store)
All purpose flour or papier-mâché
Elmer’s Glue
Wax paper
Vegetable oil

If you got your sand from the beach, sift it through a cheese cloth or a window screen to separate the larger grains from the fine stuff. Pour the fine sand into a bowl and mix in the flour or papier-mâché and mix it together well. You need to use equal amounts of flour and sand. Coat your hands lightly with vegetable oil so the sticky paste that you’re about to make won’t stick to your hands. Pour in your Elmer’s Glue slowly and knead it with your hands like bread dough. If it starts to harden before you’re done mixing, add more glue. If your hands get too crusty as you work, rinse your hands off and apply more oil. Also, if you are using beach sand and you want to add color, mix in some acrylic paint.

Break off pieces of the sandy dough and roll them into your beads. This is where you use your imagination to create the beads you will use for your jewelry. Make many different colors and sizes, or make a series of the same kind for a long beaded necklace. You can also make short tube-shaped beads, square ones and irregular shaped beads.

Set your beads on a piece of wax paper and let them dry overnight. Use a large sewing needle or any other sharp metal skewer (be careful!) to poke a hole through the middle of each bead. You need to do this while the beads are still slightly tacky, but not so soft that you squish the bead. Let them dry all the way.

Coat them with clear acrylic varnish to make them glossy and protect them, if you want. Now you can make your homemade jewelry for yourself and your loved ones!

IMG_0844

More Ideas

Substitute half of the sand (or less) with fine glitter to make sparkly beads.
Swirl different colors of the sandy dough together to make multi-colored beads.
Make beading kits with your left-over sand beads and give these kits away as gifts.
Add other natural beads like shells and tiny pieces of drift wood to make a real beachy necklace.
Sell your sand bead jewelry to people at the beach.

Crafts DIY

Make a Flower Accessory with a Hawaiian Lei

03/30/2010

Feeling crafty? Are you not sure what to do with the Hawaiian lei that you’ve had for years but, its so pretty you don’t want to get rid of it? Make a cute accessory with it! Its fun, easy and you only need a few materials…

featsm

You Need

Fabric Hawaiian Lei
Scissors
Needle
Thread
Clear nail polish
Hot glue gun

Get a container to put all of your loose flowers in and cut the string of the lei. Keep them so you can make more later, because your friends will probably want one too. Pick out about five or six loose flowers and a leaf (if your lei has them) if you want to incorporate it.

Stack the loose flowers on top of eachother, with the leaf at the bottom. Try to stagger the petals so that they aren’t perfectly lined up (like in the picture) and slip one or two pins through to hold them together while you work.

Run a few small stitches through the middle of the flower. You don’t need to do very many, just make sure its secure and the thread won’t come loose. Try to make sure your thread is the same or, close to the same color as the fabric so it stays invisible. If you have to use a different color (like I did) it won’t be too bad, just try to stay close to the center.

Now you can make your flower look more three-dimensional, like a rose or a peony. If you like the flat look, you can skip this step. Starting with the petals on top, fold one side over and run a few small stitches close to the center. Work your way around on different layers, repeating this step until your flower has the shape that you want.

Swipe a little clear nail polish along the edges of the petals so that they don’t fray any more than they may have already. You can also use your scissors to trim any strays.

Now you can attach your flower to… pretty much anything! Use a hot glue gun or your trusty needle and thread to tack it onto a pin, barrette or head band. You can also attach it to a hair tie or wear it around your wrist like a corsage. Decorate a plain hand bag with colorful fabric flowers!

More Ideas

Run some fabric glitter around the edges of the petals, or make “rain drops” in random spots.
Attach a button, pretty bead or cabochon to the middle.
Hot glue some some crystal rhinestones on the petals to create the “rain drops”.
Add other embellishments to the bottom of the flower like ribbons or lace.

If you make one, feel free to post it in the comments!

Crafts DIY

Living Art: How To Make a Terrarium

01/22/2010

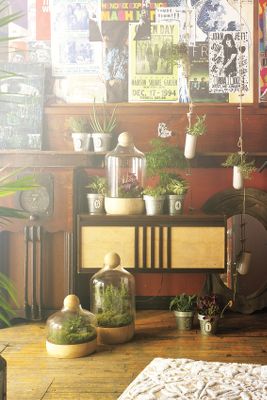
Terrariums are magical miniature pieces of nature that you can admire anywhere in your home. They are living pieces of art. You don’t even need to be a master gardener (I certainly am not) to put together and care for your own terrarium or dish garden, but you do need to know a few things about what kinds of plants need how much light and watering. Designing your own terrarium allows to you get creative and let your imagination run wild. You can include miniature statues of mythical creatures, little signs and pretty rocks. If you can’t find what you want, you can even make little mushrooms or animals out of oven bake clay.

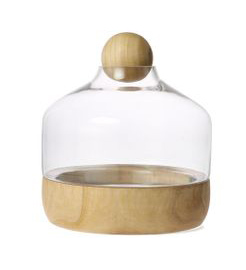
Terrariums are enclosed, so the plants need to be small enough to grow inside of a glass jar, a small glass box or any clear container. Wide-mouthed glass containers with a removable lid are the easiest to work with because you have easy access to water and prune as you need to. You can even mount your terrarium on the wall in a light box or hang it from the ceiling in a glass globe. It all depends on your imagination and the things you can find. People have even made tiny terrariums inside old light bulbs!

970065_020_b 970065_020_f
Tabletop Terrariums at Athopologie

You Need

A container
A group of small plant starters that will grow under the same amount
of light and watering.
Some sand or small pebbles
Activated charcoal
Spaghnum moss
Potting soil

You should plan out how you want it to look before you start collecting your supplies–make a sketch or just have a vivid image in your head. The first thing you will place in your container is a layer of coarse sand or small pebbles that is about one inch thick. This layer is for drainage and will keep your plants’ roots from rotting.

Next you will need to lay on a thin layer of activated charcoal–the same kind they use in aquarium filters to keep the air flow or water flow clean, so you can find this at the pet store. If you are planting in an open-air container you won’t need this.

Lay down your Spaghnum moss in a thin layer so that your soil won’t sink down into the charcoal and pebbles every time you water it.

Now you can add your soil. You can buy pre-mixed terrarium soil blends or you can just mix 2 parts regular potting soil, 1 part coarse builders sand (never use beach sand) and 1 part leaf mold (aka humus). You don’t need to add fertilizer because you don’t want the plants to grow very large and there is already a substantial amount in the potting soil.

Sometimes all your little plants require for watering is a good misting from a spray bottle to emulate rain. You should never place your terrarium in direct sunlight.

If you want to make a desert-themed cactus garden, this would be much easier to do in a dish rather than a terrarium. Since cacti and succulents need drier, sandy soil, you can use special potting soil
made for them or put your potting soil down and then place an equal layer of coarse sand on top after you plant your cacti. You don’t need spaghnum moss, charcoal or pebbles for a desert garden, but if you are using a planter dish with a hole at the bottom, be sure to put a small piece of screen over it so your sand doesn’t fall out. Also, unlike a terrarium, your cacti will need plenty of direct sunlight. Wear thick gardening gloves if you are working with sharp cacti!

Your cacti will only need to be watered about once a month. Always make sure you water your plants with luke warm water instead of cold water so you don’t shock the roots. Image someone throwing ice cold water on you on a hot day!

I hope I’ve sparked your interest for making your own terrarium! They make great little decorations and interesting gifts. Here is a list of a few small plants that would be good for a terrarium or dish garden but this definitely isn’t all of them. Do some research on the care of the plants that you want to use and let your imagination run wild as you plan out the look of your mini garden.

Irish Moss

Great for any tiny landscape and only grows to a max of three inches tall.

Miniature Peperomia

Stays small and and has tiny round leaves. Very easy to maintain.

Wintergreen

Grows to about six inches tall and is very hearty. Blooms tiny white flowers in the summer and smells minty.

Dwarf Japanese Sweet Flag

Tiny ornamental grass that resembles an Iris plant, but only grows to two inches tall.

Leptinellas

Looks exactly like an itty bitty fern and are often refered to as “mini ferns”. These are also easy to take care of.

Butterwort

Cool little carnivorous plant that attracts insects like a living fly paper and dissolves them with digestive juices on its leaves. Only grows to about one inch tall with sticky leaves but will bloom a pretty purple flower.

Mini Bonsai

Would be a cool addition to a dish garden but would be hard to maintain in a closed container because they need to be trimmed and trained into the bonsai shape.

Earth star AKA Starfish Plant

It stays under six inches tall and grows a rosetted star shape of long, spiked leaves. It is easy to care for and is perfectly suited for a terrarium because it loves humity.

Succulents

Cacti and other succulents like Aloe Vera and Jade grow very slowly and will eventually outgrow whatever container you put them in. Plant them when they are small and you’ll be able to enjoy your mini desert garden for quite a while.

Escapeland

Power Animals: What is Yours?

12/26/2009
maneki

“I think I could turn and live with animals,
they’re so placid and self-contained,
I stand and look at them long and long.
They do not sweat and whine about their condition,
They do not lie awake in the dark and weep for their sins,
They do not make me sick discussing their duty to God,
Not one is dissatisfied,
not one is demented with the mania of owning things,
Not one kneels to another,
nor to his kind that lived thousands of years ago,
Not one is respectable or unhappy over the whole earth.”
~ Walt Whitman , “Song of Myself”

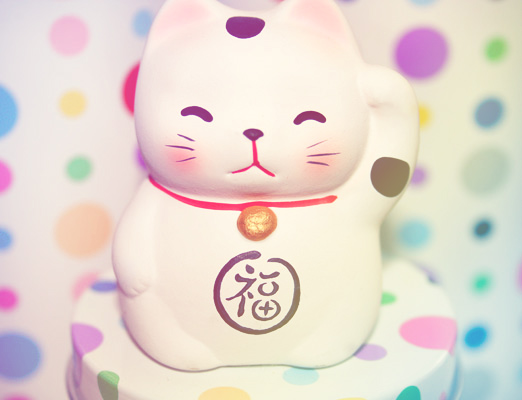
Animals have been admired, revered and even worshiped throughout the history of mankind. They are so beautiful and powerful that I sometimes think that we envy them, in the ways that we strip from them their coats and skin, or how we try to mimic their physical features. Although I’m not much for the skinning, I do love the cat-eye eyeliner effect.

You may also feel a special connection to a certain species, maybe even a sense of kinship. Do you find yourself enamored with fascination at the sound of a wolf howling, or have you ever stopped to look up at the sky as a hawk or eagle flew overhead? Is there a certain animal that stalks your subconscious mind and maybe scares you a little? Many indigenous cultures around the world believe that different animals all carry a lesson for mankind. An “animal totem” (also known as a “power animal”) is an animal spirit that watches over an individual or a group–looks out for them and teaches them what they need to know to survive.

I’ve always been fascinated by wolves and thought they were beautiful creatures. I started learning more about them and found out that they are very family oriented and support the other members of their pack. The females all help each other with the birthing and taking care of the babies, and I love the fact that they “sing” together by howling at the moon in an eerie chorus. They are also one of the few kinds of animal that mates for life, which really signifies to me how intelligent they are.

Like the loyal and family-oriented wolf, there may be an animal that reflects your own personalty traits, or represents to you a trait that you value. The beaver is an animal that works hard to build a sturdy structure for him and his family, a home that he can pass down through the generations. The eagle flies high over head so she can see for miles around, but she can still see when a field mouse peaks its head out of a tiny hole in the ground. After you learn more about your favorite animal, you might even discover that you admired them for a trait that you value that goes way beyond the physical.

The connection you have with a certain animal doesn’t always need to be spiritual. If you admire a certain animal for their physical traits–such as the antlers on a male deer, or the eyes of a cat or the paw prints of a dog, you can incorporate these symbols into your wardrobe or your home decor. The animal may even be so close to your heart that you feel compelled to get a tattoo related to them. Recently, an image of a piranha kept popping into my head, and it wouldn’t stop until I sat down and drew a picture of this animal. I think this particular animal was showing up in my subconscious because it represented my fears toward a certain situation, and I had to face that fear before it could stop tormenting me.

If there is an animal that wants out of your subconscious, let it roam free and howl or roar or whatever it wants to do. Let your inner doe run gracefully and silently through the trees. Try to see the world through your hamster’s eyes by getting down on his level. Imagine weaving a net-like home for yourself, suspended in the corner of a dark basement, waiting for your dinner to fly in. Animals represent our inner, primal natures that sometimes get repressed, and this is a side of ourselves that we should explore so that we can come to fully understand ourselves and the world around us.

Here is a short list of animals and the things that they generally represent:

Spider

Weaving illusions, writing or creating art.

Bear

Strength and protecting your family and territory.

Cat

Courage, agility and being able to see into the mysterious.

Dolphin

Playfully joyous and lovers of life.

Frog

Adapting to a situation and knowing when to leap.

Falcon

Knowing when to take swift action.

Dog

Loyalty and selflessly protecting loved ones