I love this cute business card case. It’s an easy-to-make, quick project and it has such a big impact when it is finished. I love how easy it is to customize to your own taste (by choosing different colors and different ribbon) so it can really represent your own business style. I use a sewing machine to make it, but it would be perfectly fine to hand-sew the case if you don’t have a machine.
Supplies
1/8 yard of wool felt
12″ of ribbon (I used two pieces of 12″ ribbon in my case)
thread
optional: pinking shears
Instructions
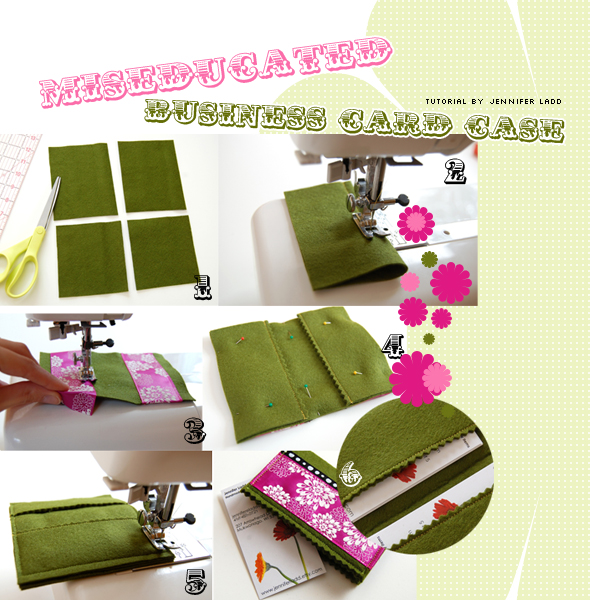
1 Cut four pieces of wool felt: two pieces are 5.5″ by 4.25″, the other two pieces 4.75″ by 4.25″.
2. Fold the smaller piece in half so that the folded edge is the one that is 4.25″ across. Sew along the folded edge. I use the edge of my zipper foot as a guide when I sew to help make this seam straight – just line the edge of the fold up with the edge of your foot.
3. Optional: I use pinking shears to trim the seam and give the edge a more decorative look. You don’t have to do this step if you would like your edge straight.
4. Repeat with the other small piece of fabric.
5. Cut your ribbon in half. Pin one piece of ribbon onto each of the shorter edges of one of your larger pieces of felt. Fold the edges under your felt before you sew so they will be caught by your stitching and held securely in place. Stitch a seam across both edges of the ribbon to hold it in place.
6. Make a sandwich with all of your pieces: first lay your felt with the ribbon face down, then the other large piece of felt. Then place one of your folded pieces at each edge (with the stitched edges toward the center). Pin all these layer together so they don’t move while you sew them.
7 Stitch carefully around all the edges.
8. Optional: I use my pinking shears again to add a decorative edge to the bottom.
9. Yea! You’re finished! Fold your case in half, insert business cards into each side, and enjoy!
