Self Decoration

1940s Beauty, Fashion and Action Resurrection

04/03/2009

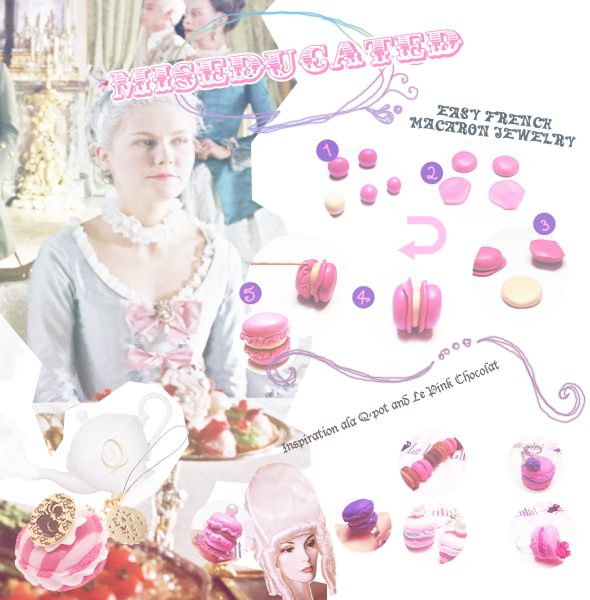
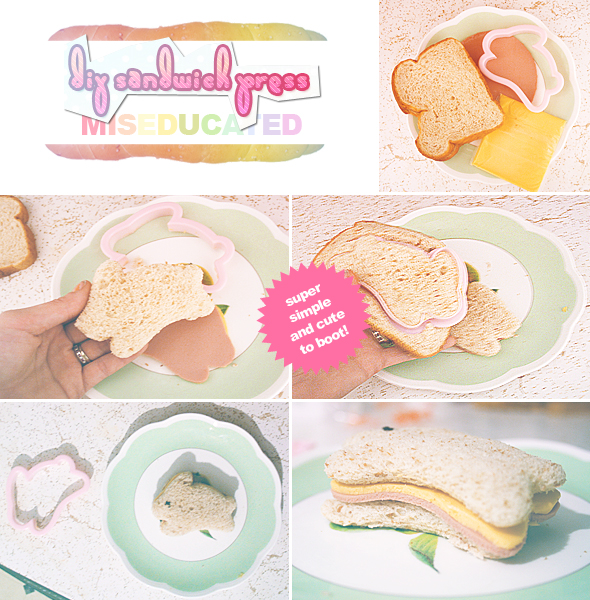
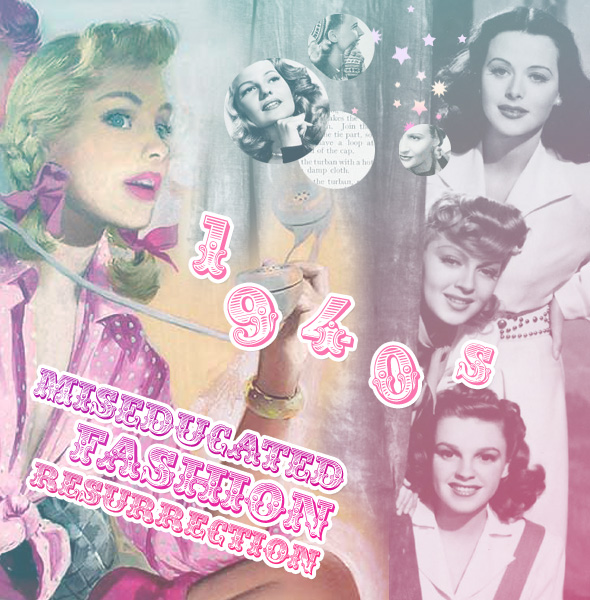
Call me crazy, call me zany or simply call me metaphysically inclined. I have always had a sneaking suspicion that in my past lives — I envision two of them, darling — I was a regal sweetheart with a fabulous sense of style.

Oh, and it shouldn’t surprise you that each of my previous cycles on Earth were in equally wonderful eras: Lifetime #1: the European 1750s (I suspect I was a fling of Herr Mozart’s) and Lifetime #2: the legendary American 1940s.

As the title of this article implies, we’re going to focus on the latter, today. And, because I’m ordaining myself as Miseducated’s 40s guru (hey, I lived the life – wink!), I’m going to share with you little ways to incorporate that style into our fresh and fabulous 21st century.

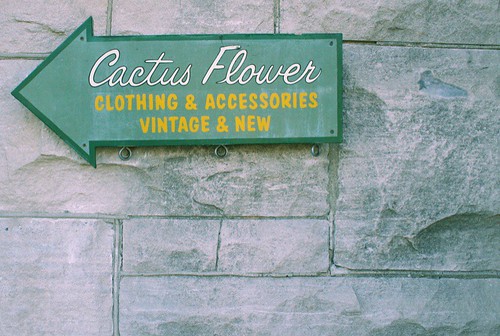
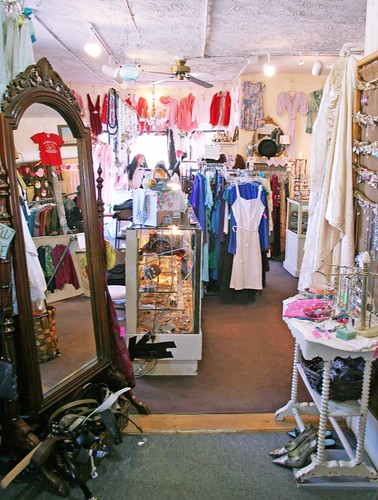
Before we get started, let me say this: Invest in vintage
Kind of a no-brainer. But really, unless you have an air of authenticity about you then you won’t be taken very seriously! Hit up your local flea market, antique store, E-Bay or even Goodwill and you’re bound to find some goodies for a bargain.

1940s resurection

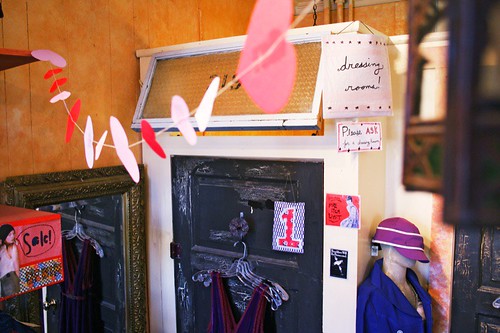
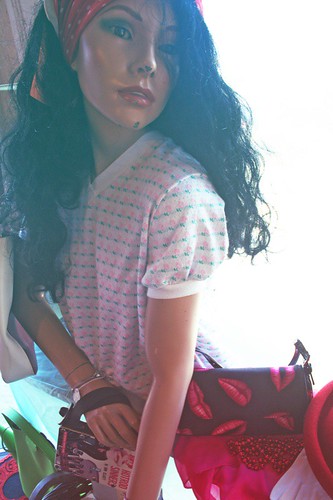
Style Tip #1: Hats and Hair

After you’ve styled your hair appropriately (check out YouTube for some great hair tutorials, like this easy one), literally top everything off with a 40s inspired hat. All sorts of hats were worn back in the day, so it’ll be easy to find a type that suits your fancy! I prefer small hats with a flock of feathers or a tiny, off-to-the-side veil! You’ll be in heaven with all the colors, shapes and sizes there are to choose from!

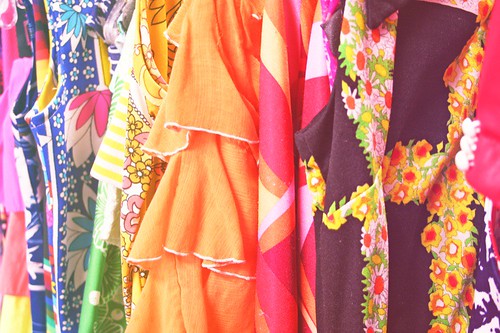
Style Tip #2: Hot Bod, Hot Dress!

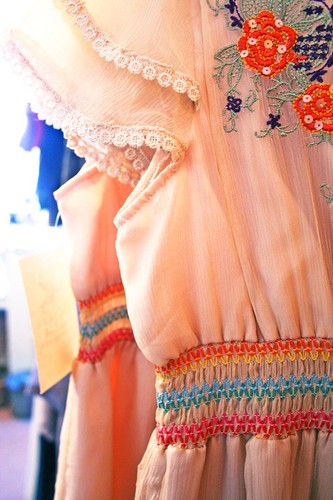
The classic 40s dress is characterized by a cinched waist and flowy bottom half. Polka-dots are a guaranteed hit! Try shopping for some great dresses at Viva La Vintage, Dorotheas Closet Vintage, or Damn Good Vintage. No need to spend tons of money, I’ve found a whollup of pretty numbers on eBay and at Goodwill.

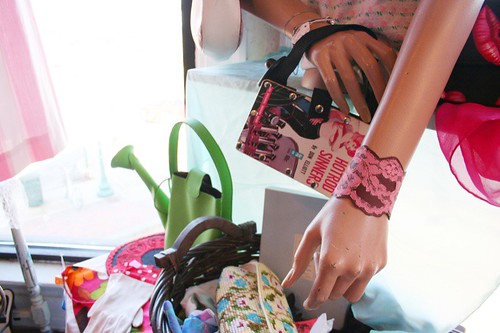
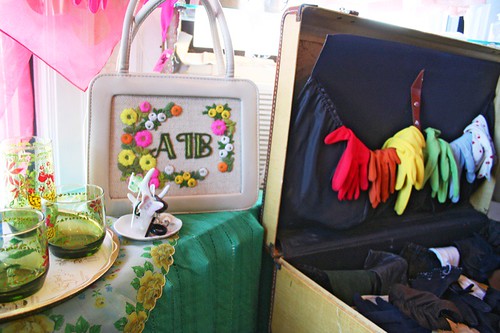
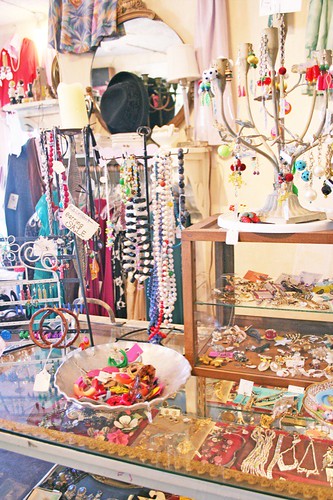
Style Tip #3: Clutch, please!

It’s important to have a purse to carry around, even when you’re prancing in your 40s gear. I mean, really, where else would we keep our lipgoss, cell-phone and identification? A pocket just won’t do! The perfect accessory to your outfit is a sweet little clutch and lucky for you, those are easy to find! Choose a shade that sets the tone you’re after! Roarin’ red? Fabulous! Sparkly sequins? Oh yeah!

Style Tip #4: Such a pretty face!

When it comes to dolling up your face, keep these in mind: luscious, fake lashes will take you far; outline your lips with a pretty shade of red and color them in (be sure to accentuate the “V” on your top lip); wear a rosey-posey blush that’s only subtle enough. Don’t be afraid to have fun with your makeup.

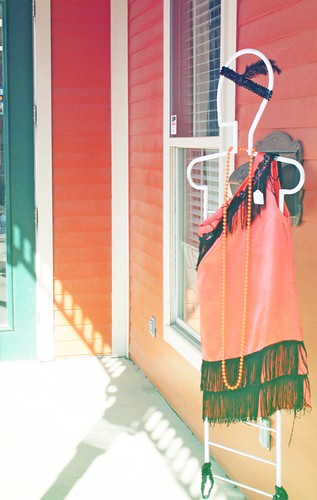
Style Tip #5: Gloves keep your hands clean!

You know they do! They also keep you looking refined, stylish and oh-so 40-licious! I like to keep things pristine with a stark, crisp white. You may be more inclined to roll up a pair of bright yellow duds. Whatever makes you happy is fine by me.

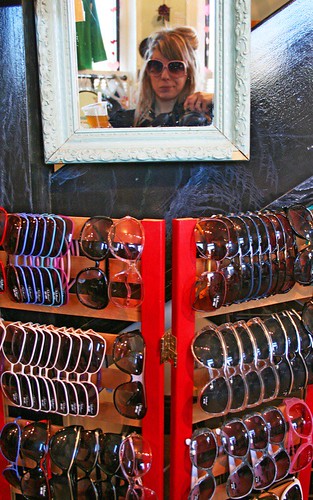
Style Tip #6: Cat-eye glasses

Whether you sport sunglasses or a pair of faux reading glasses, make them snazzy! Try a rhinestone-enhanced, golden cat-eye. Or maybe a subtle black is more your type. Either way, you’ll make a (smart) statement!

Style Tip #7: For the bold: Cigarette holder

I don’t condone smoking (keep your lungs happy, ladies), but a stationary cigarette in a pretty cigarette holder is really kind of drool-worthy. Purchase one for under $5 here and pretend you’re Audrey at the ball.

Bonus

40s slang to slip into your vocabulary. *
• Flat Tire – A dull witted, insipid, disappointing date.
• Cat’s Meow – Something splendid or stylish
• Heebie-Jeebies – The jitters.
• Ossified – a drunk person.
• Scram – Ask someone to leave immediately.
• Whoopee – To have a good time.

As in: Scram, ossified flat tire! You give me the heebie-jeebies when all I want is a cat’s meow whoopee!

*To be used only when employing 40s-inspired style.

Escapeland

Playfish’s Restaurant City or Bust

04/01/2009

For yet another cute, simple and addicting game to make those hours behind a computer screen a bit more fun look at Restaurant City. Whether you’re heavily involved or not, your restaurant can run while you’re away and continues to make money. If you’re trying to level, make sure you keep your window open so your gourmet points will save.

Keeping with playfish tradition, the game is very interactive with friends. You may hire them as employees, visit their shops and leave messages or send gifts. It pushes being neighborly and trading ingredients to level your recipes up.

It’s quite expensive to buy furniture and to remodel your restaurant so keeping employees happy is key!

restaurant city

restaurant city

Conversation Sparklers

What’s your restaurants name?
Does your character resemble you or did you create an alter-ego?
What design or theme are you planning for?
Which recipe ingredients are you collecting?

With every new friend you get a new ingredient to cook with, feel free to add me for a new Restaurant City neighbor!

DIY Recipes

Vinegar Beauty Recipes for Vamps

03/26/2009

When it comes to DIY Beauty, recipes using vinegar are all the craze. Why? Because vinegar does an excellent job of cleaning, polishing and wiping away impurities. In addition, vinegar is easy to come by, inexpensive and always practical. Here are a few recipes to give a try the next time you’ve got vinegar to spare and money to save!

diy vinegar beauty

Apple Vinegar Hair Rinse

After using various products and chemicals on your hair, it tends to become dull, lifeless and not too healthy. A major culprit of this is product build up. This recipe does wonders for that dilemma and should be done once a week. Here’s what you need:

1 small-medium lemon
2 tablespoons apple vinegar
2 tablespoons warm water

In a small bowl, combine your water and vinegar. Cut your lemon in half and squeeze out the contents of half of it. Make sure to remove any seeds that escape! Mix thoroughly and let it set for 5-10 minutes while you’re washing your hair. After washing your hair in the shower, apply this mixture thoroughly. Let it set for 2 minutes and then rinse out with tepid water (cold if you can bare it).

Vinegar Astringent for your Face

This is great for oily, acne-prone skin and can be whipped up in a flash. All you need is water and a little vinegar and you’re all set. Here’s the specifics:

1 tablespoon apple cider vinegar
2 tablespoons warm water
Cotton balls

Combine both ingredients and dip your cotton ball into the mixture. After using your regular face wash, apply this evenly by wiping the cotton ball around your face. Let it set for 10 minutes and then rinse thoroughly with cold water to tighten pores. Gently pat dry.

Strawberry Vinegar Face Mask

This sweet treat makes your skin glow and is easy to prepare. Gather these items:

5-6 medium sized strawberries
1 tablespoon apple cider vinegar
1 egg white

First, separate your egg yolk from your egg white into a medium sized bowl. In a separate bowl, mash your strawberries until they are relatively smooth/consistent. Add the egg white to your strawberries and mix well. Gradually add the vinegar and stir until you have a nice paste.

After washing your face with your typical face wash, apply the mixture generously onto your face. Let it set for 15 minutes and rinse with warm water. Splash cold water on your face to tighten pores and gently pat dry.

spoon full of vinegar
DIY Self Decoration

The Beauty Benefits of Bathing in Tea [in Australia]

03/25/2009
Bathing in Tea

Have you ever loved a food or drink so much that you wish you could bathe in it?

I’m a huge fan of tea: the immune boost, the antioxidants, the warm fuzzy feeling of a hot mug on a cold night. I think my ultimate evening consists of curling up on the couch with a cup of tea and a box of cookies for dunking. In short, I truly do love tea so much that I could bathe in it… and last year, I did.

The time: early spring. The location: Lennox Head, Australia. I had the amazing opportunity to visit my sister at her work abroad location there and her camp was located just steps away from Lake Ainsworth, a freshwater lake made entirely out of tea.

Surrounded by tea trees, Lake Ainsworth’s waters absorb tannins from surrounding tree roots and fallen tea leaves, transforming the waters into a deep, dark brew. The locals believe that the water has healing properties and that a quick swim can do wonders for the skin. Personally, though my skin did feel a bit softer that day, it’s my mind that has never felt more at peace than while floating in a bath of tea.

Want to try it yourself?

If you can’t make the trip Down Under, don’t worry, just run yourself a hot bath, drop in several tea bags, lay back, and relax.

Feeling crafty?

You can also create your own concoction with loose tea leaves and dried flowers. Once it’s ready, wrap your personalized mixture in muslin or cheesecloth (or pantyhose — thanks, Wendy!) and you‘re ready for a long, relaxing steep.

Other Drinks to Soak In

  • Sake: A Geisha secret, pouring a cup full of sake into your tub is said to soften your skin and speed up your metabolism.
  • Milk and Honey: Milk dissolved dead skin cells to make your skin baby soft, while honey has antibacterial properties to help heal wounds. It worked wonders for Cleopatra, so why not you?
  • Red Wine: Teri Hatcher of Desperate Housewives breaks out the vino for her bath to make her skin lush and glowing…just don‘t use too much or you might stain your tub!
Crafts DIY

Knot Your Own Fortune Coins Necklace

03/25/2009

Hi, my name is Amanda Yu, I am the owner and designer of ”Exotic Flavour” the colorful, playful and creative jewelry design. I am grateful that I had been invited by Miseducated to prepare this DIY story for you. I hope you will like it. I will show you how to make this Fortune Coins Pink Necklace.

fortune necklace

Instructions

1. The material is very simple, prepare a Pink cotton cord (length: 155cm and thick: 3mm) and Sex piece of the round wood ornament with a hole in the middle.
2. Put on one wood ornament and make a knot. This is a part of the clasp.
3. Coil two small circles, hold tight with your left thump.
4. Round the third circle between the first two circles, pull the cord generally.
5. Put another wood ornament and repeat (3.) and (4.) until you have five patterns.
6. In the end of the cord I made an oriental cross knot and tight it nicely.
7. If you think it is complicated, you can make any knots you like. Just make sure the little circle is not too big for the wood ornament – other part of the clasp. (1)
8. The Fortune Coins Pink Necklace is now finished.

I hope you find this is inspiring. You can combine with different materials or perhaps develop another construction from this basic oriental knot. Here are two other creation I made earlier based on the same techniques.

Crafts DIY

Sew an Adorable Business Card Case

03/25/2009

I love this cute business card case. It’s an easy-to-make, quick project and it has such a big impact when it is finished. I love how easy it is to customize to your own taste (by choosing different colors and different ribbon) so it can really represent your own business style. I use a sewing machine to make it, but it would be perfectly fine to hand-sew the case if you don’t have a machine.

diy business card case

Supplies

1/8 yard of wool felt
12″ of ribbon (I used two pieces of 12″ ribbon in my case)
thread
optional: pinking shears

Instructions

1 Cut four pieces of wool felt: two pieces are 5.5″ by 4.25″, the other two pieces 4.75″ by 4.25″.
2. Fold the smaller piece in half so that the folded edge is the one that is 4.25″ across. Sew along the folded edge. I use the edge of my zipper foot as a guide when I sew to help make this seam straight – just line the edge of the fold up with the edge of your foot.
3. Optional: I use pinking shears to trim the seam and give the edge a more decorative look. You don’t have to do this step if you would like your edge straight.
4. Repeat with the other small piece of fabric.
5. Cut your ribbon in half. Pin one piece of ribbon onto each of the shorter edges of one of your larger pieces of felt. Fold the edges under your felt before you sew so they will be caught by your stitching and held securely in place. Stitch a seam across both edges of the ribbon to hold it in place.
6. Make a sandwich with all of your pieces: first lay your felt with the ribbon face down, then the other large piece of felt. Then place one of your folded pieces at each edge (with the stitched edges toward the center). Pin all these layer together so they don’t move while you sew them.
7 Stitch carefully around all the edges.
8. Optional: I use my pinking shears again to add a decorative edge to the bottom.
9. Yea! You’re finished! Fold your case in half, insert business cards into each side, and enjoy!

Crafts DIY

Create Easy Macaron Charms with Clay

03/25/2009

Finally, I was able to catch some sun through my tiny window and take some photos, so here is the step-by-step process to make polymer clay macarons!

Easy Macaron Jewelry

Instructions

1. Make 5 balls: 2 bigger, 2 smaller and 1 of a different colour
2. Slightly flatten the 2 bigger, and completely the 2 smaller
3. Put each “slightly flat” with a “very flat” and flatten the different coloured one too
4. Make a “sandwich” with the 3 of them
5. Ruffle what exceeds form the sandwich with an instrument like a tooth pick
6. Put it in the oven for half an hour (depends on the clay you use)
7. Do not eat!

Crafts DIY

How to Create the Perfect Polymer Macarons

03/25/2009

I believe many girls love macarons. Tell me who can resist the delicious and cute looking French macaron?

macaron diy

Besides the edible macaron, macaron accessories are also very popular in Japan and all around the world. There are may ways to make macaron accessories for yourself or for your little Blythe. The simplest way is to use air dry clay or polymer clay. In this tutorial, I choose to use air dry clay because I don’t like to use polymer clay that has to be cured in the oven.

macaron diy

You Need

Acrylic paint (any colour you prefer)
Clay cutter and measurement spoon (size is up to you)
9-pin
Embedded crystals (any colour you prefer)
Vaseline Petroleum Jelly or hand lotion
Air dry clay (you can use polymer clay which needed heat up in oven to cure)

Steps

1. Apply the Vaseline (or hand lotion) on the tools and surface that will contact with the clay. This step is important to avoid the clay stick at the tools or surface.
2. Apply the Vaseline on the surface and your hands too.
3. Cut this amount of clay (enough to make two macarons).
4. Put a little red acrylic paint on top of the clay (I chose red because I want to make a pink macaron).
5. Twist and rub the clay until the colours mixed evenly with the clay.
6. Then put the measurement spoon on top of the clay.
7. Press down so to get a shape alike the shape of the measurement spoon
8. Please see if it looks like the photograph above.
9 Then use any flat surface to press it down until it looks like this.
10. Repeat the step 6 to 9 for the bottom piece. Some embedded crystals are put on top of the top piece.
11. As shown in this picture.
12. Cut this amount of clay.
13. Put a little bit dark brown acrylic paint on top of the clay (to add some colour to the filling) then twist and rub the clay until the colour mixed evenly with the clay.
14. Then use any flat surface to press it down until it looks like this.
15. Sandwich the white clay in between the top and bottom pieces of pink macaron.
16. If you want to make accessories with it, you have to add a 9-pin. Enter the 9-pin from the side.
17. Set aside the clay macaron for two days for completely air dry.

Tips

1. I recommend you to trim your nails first before handling the clay, because clay tends to stick to long nails.
2. Make sure all the tools and surface are dust free to avoid any dust twisted or rubbed into the clay.
3. In case the clay become dry, add a few drop of water to get back the flexible feeling.

DIY Recipes

Sandwich Pressing for Lunch and Bento Boxes

03/13/2009

Want cute sandwiches and snacks in minutes? Don’t shell out a lot of money for the Japanese sandwich press kit, why not spend that money on the ingredients instead? All you need to create cute, crafted sandwiches is a cookie cutter of your liking and a surface to cut your food on. Just follow the DIY instructions next for an easy, cute sandwich for tea party guests and children to enjoy!

diy sandwich press

Need some sandwich ideas? Try layering these items to make cute, Japanese sandwiches:

Sandwich Ideas

cream, strawberries, bread
peanut butter, jelly, bread
egg, bacon, cheese, bread
Nutella, cream, bananas, bread
tuna + cottage cheese mixed, lettuce, bread
cream, kiwi, strawberry, peach, bread
sticky rice, seaweed, tuna + mayonnaise
deli meat, cheese, lettuce, bread
bacon, lettuce, tomato, bread
cookie, ice cream

sandwich press how-to

* If an item is thick, try cutting them individually and then stacking them. If you’re adding something creamy/messy try spreading it between bread first. Try a biscuit or sweet bread if you’d like something a little more sweet than plain bread!

Business Features Visual Splendor

Thrifting and Touring Bloomington, Indiana

03/13/2009

If you’ve ever been to Bloomington, Indiana you know there’s no shortage on fun places to explore. It’s absolutely bustling with thrift shops, cute cafes and anything you could ever want to eat. The ever-growing small businesses are always changing for the thousands of college students which attend Indiana University nearby. It’s a great spot to find one-of-a-kind thrifty goodies and delicious food. Whether you’re looking for food to find old favorites in restaurants or to try something new, you’ll more than likely find what you’re looking for in Bloomington.

rosey outlook

follow the leader

enlightenment

My mother grew up in Bloomington and has always had a soft spot for the college town. She loves to see the new changes and reminisce about her old favorite hot spots. Luckily she wanted to take me around to some of her favorite places, recently, and I took my camera along for the ride. Feel free to skip along my steps and enjoy thrifting, international markets and fun for many.

Chow Bar

216 South Indiana Ave

Amazing buffet with delicious Chinese food and tons of bubble tea flavors/options! Better yet, the fortune cookie at the end of this meal is chocolate flavored.

bubble horizon

chow bar

Cactus Flower

322 East Kirkwood Ave # 202

this way

hotrod sinners

rainbow wave

heart string

on sale

step in time

heart sale

hidden away

looking in

see you

dressing

jewelery stand

Soma Coffee House

322 East Kirkwood Ave

soma

soma's tv

Vintage Warehouse

401 East Fourth Street

to the shop

array of clothing

Sahara Mart

106 East Second Street

In the market for chocolate? a new teapot or tea cup? Wine? Tea? Go here no matter what market goods you’re looking for because you’ll find it and a whole bunch of other things you always wished existed here.

chocoholic

dressing up

tea crazy

Oriental International Market

408 East 4th St

tasty joy

.. and as I traveled Bloomington, Indiana…
stumped

laughing planet

pick your poison