Browsing Category

DIY

Colorful projects that will inspire you to create.

Crafts DIY

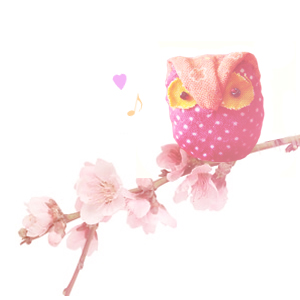
Create an Owl to be your Pal

09/24/2009

So you want to create a ‘fuggly’ owl to be your pal? Though yours doesn’t have to be fuggly, that’s just the way I sew! (hehe)

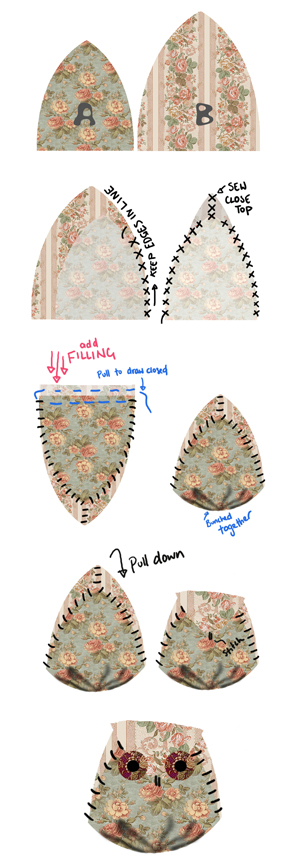
1. Cut out two triangles (one small one, one bigger one) with slightly curved edges as seen.

note: it’s not an exact science, so you may like to experiment with longer, shorter, wider, thinner, curvier triangles.

2. Face the fabric inwards and sew up one side. As you sew, pull the two fabric edges so that they are together. There will be a gap where the ‘A’ triangle ends. Continue sewing up along the side of B triangle, then back down along the other side.

3. Sew around the bottom opening so that you can pull on the thread and draw the bottom closed like a drawstring bag. Fill it with filling and pull the bottom closed.

note: I use grain but wool or polyester stuffing is also good. Do not fill it up too much!

4. Fold the top down and secure it. This makes the beak.

note: This is why you don’t want to fill it too much because you wont be able to pull the beak far down, though some people like very small beaks. If so then fill it up lots!

5. Add eyes.

note: Beads work well. Fabric has a tendency to fray when cut too small. Don’t learn this the hard way!

Business Features DIY

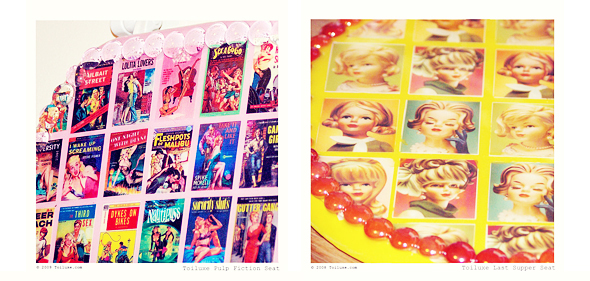
Toiluxe: Make Your Toilet Lux

09/17/2009

It started with a simple dilemma:

What kind of gift do I give the girl who has everything?

I myself was one of those girls, so I knew what it would feel like to be on the receiving end of another kitschy collectible, retro design coffee table book, funky framed Jesus picture… I loved each and every item, but I was at the point where there was nowhere to PUT anything, and I was not organized or patient enough to deal with seasonally switching things up. I couldn’t bring myself to pack away older items to make space for newer ones, because I had a sentimental attachment to each and every one. They all defined me, defined my lifestyle, defined how I felt when I woke up in the morning. In fact, the only room that reflected who I was the LEAST, was my bathroom, which was fine, because how much time do I spend in there anyway?

Wait a second…

The bathroom…

I went to Home Depot. After much wandering around, lost among contractors and home-improvement-ers, I found it – the wall of toilet seats. The aisle seemed to glow as if I had found the pot of gold at the end of the rainbow. As if I had discovered the meaning of life, or who was buried in Al Capone’s tomb…

It was perfect.

And everything just took off from there.


Making art out of toilet seats is not a quick-fix type of project. It involves sanding, priming, painting, cutting, pasting, gluing, detailing, and SO MUCH WAITING. Every step involves the need for something to dry – whether it be paint, modge-podge, or acrylic resin. I had to learn how to pace myself (my mother always used to say, “You want everything to happen yesterday!”) and it’s true. But I finally discovered my ideal working environment – my living room (at this point I’d like to thank my husband for his unrelenting patience.) I’d work on two seats at a time – switching back and forth while one was in a drying stage – and the television would be tuned to a campy, cheesy horror movie. The only explanation I can come up with for that is that these particular movies are terrible enough where if I was in a working stage (painting, decoupaging, detailing) and my attention was elsewhere, I could easily tear my attention away from the television and not worry that I was missing some crucial element to the story, yet the movies were also amusing enough that they kept me occupied during any drying stages (which could take anywhere from 10 to 25 minutes.)

I have since changed our home office into a small studio (again, thank you, dear husband, for being supportive enough to my craft for agreeing to move your half of the office elsewhere, and for bringing home the 300 pound cabinet you had at work for me to store my seats in a small warehouse environment.) I’ve been fortunate enough to be able to show my work at Boston’s Bazaare Bizarre and Somerville’s ArtBeat in Davis Square. 75% of my business is from custom orders which has allowed me to step out of my comfort zone and create designs I never would have thought of. The Toiluxe Nude Collection started via a request from my landlord, for which I will forever be grateful.
My creation process is constant – I live, breathe and dream toilet seats. If I could eat toilet seats, I would probably consider it. Toiluxe has been the most satisfying creative outlet I have had in a long time. To be able to create and touch a piece of art – a piece of art that also provides total functionality – has an entirely different sense of satisfaction from the computer-based graphic design I have always done in the past.

I love what I create. My goal is to bring joy to bathrooms across America, and even beyond.

DIY

Customizing a New Home

08/25/2009

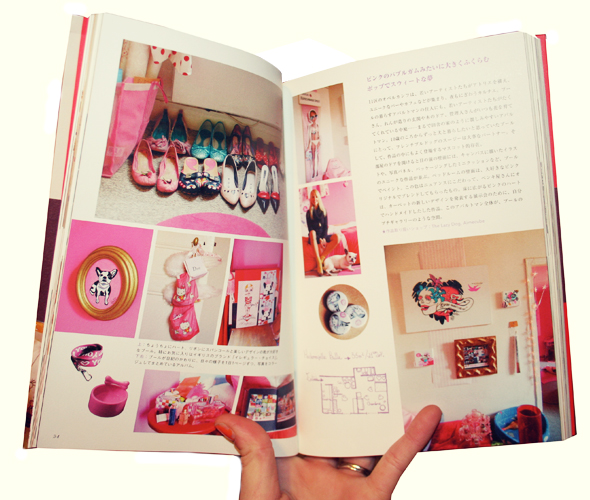
CUTiE BookTurning your apartment, house or beach-side bungalow into a home? I’ve moved a lot only recently. After being smothered in a small-town, for way too long, I was ready for new adventures and surroundings. First I lived with a family in my heart*throb, japan. Then we moved around in Indiana’s capital delicious wonderland city Indianapolis, from downtown apartment to east-side apartment. During the summers, I shack up with my lovely best friend in California and always find new places and friends to love. I’ve found amazing people I want to forever keep in my life (there are still many years for us to end up together) and I knew if I explored to find my own paradise in the US I would be truly at peace with my world. (I still plan to visit Japan always until I finally accept a job there -why don’t you???- and live my dreams)

delicate & sweet a balcony for me shoes in a row

So we’re picking up and moving again! This time to a paradise we fell in love with together, Nevada. Now Las Vegas is a kitschy tourist attraction, mind you, but there are always amazing things going on that you can be involved in, it’s not far from L.A. and the sunshine replenishes your body with Vitamin D as well as inspires your mind to produce melatonin.

The most important thing about a new home is what new whimsical world will unfold as I place items around and attempt to customize my surroundings (this gets tough in city apartments!). In case you need a kick start or just a push in a new direction, enjoy the inspiration and let your home drink it up!

Let’s Get Started!

Need some furniture or decor inspiration? Take a look at the resources listed at the end of the article.
Be sure to hit up local thrift stores and flea markets, you could find delectable art-deco, mid-century and antique goodies to paint/ design for your home for a fraction of the cost of most designer deco. One of a kind items are always smile inducers while lounging in your quarters.

With some sanding and a few coats of glossy enamel you can turn a sad, chipped and rusty 60s wall shelf into a new sleek treasure.

paint it~

Starting to see endless possibilities in creating your ultimate wonderland on earth?

Yummy Inspiration & Boutiques

Urban Outfitters: Apartment
Brocade Home
IKEA
Mason Reve
The Paris Apartment
Espirit Cabane
Jeu de Paumes Books
Three Potato Four
Decor8 Blog
Design*Sponge

Miseducated Articles

A Spare Roomedy
Apartment Seventy-Seven
Pretty on Penn St
Home in South Korea
Interiors of Amelie
Gwen Stefani’s Chic Space
Lala’s Kitschy Paradise

DIY Recipes

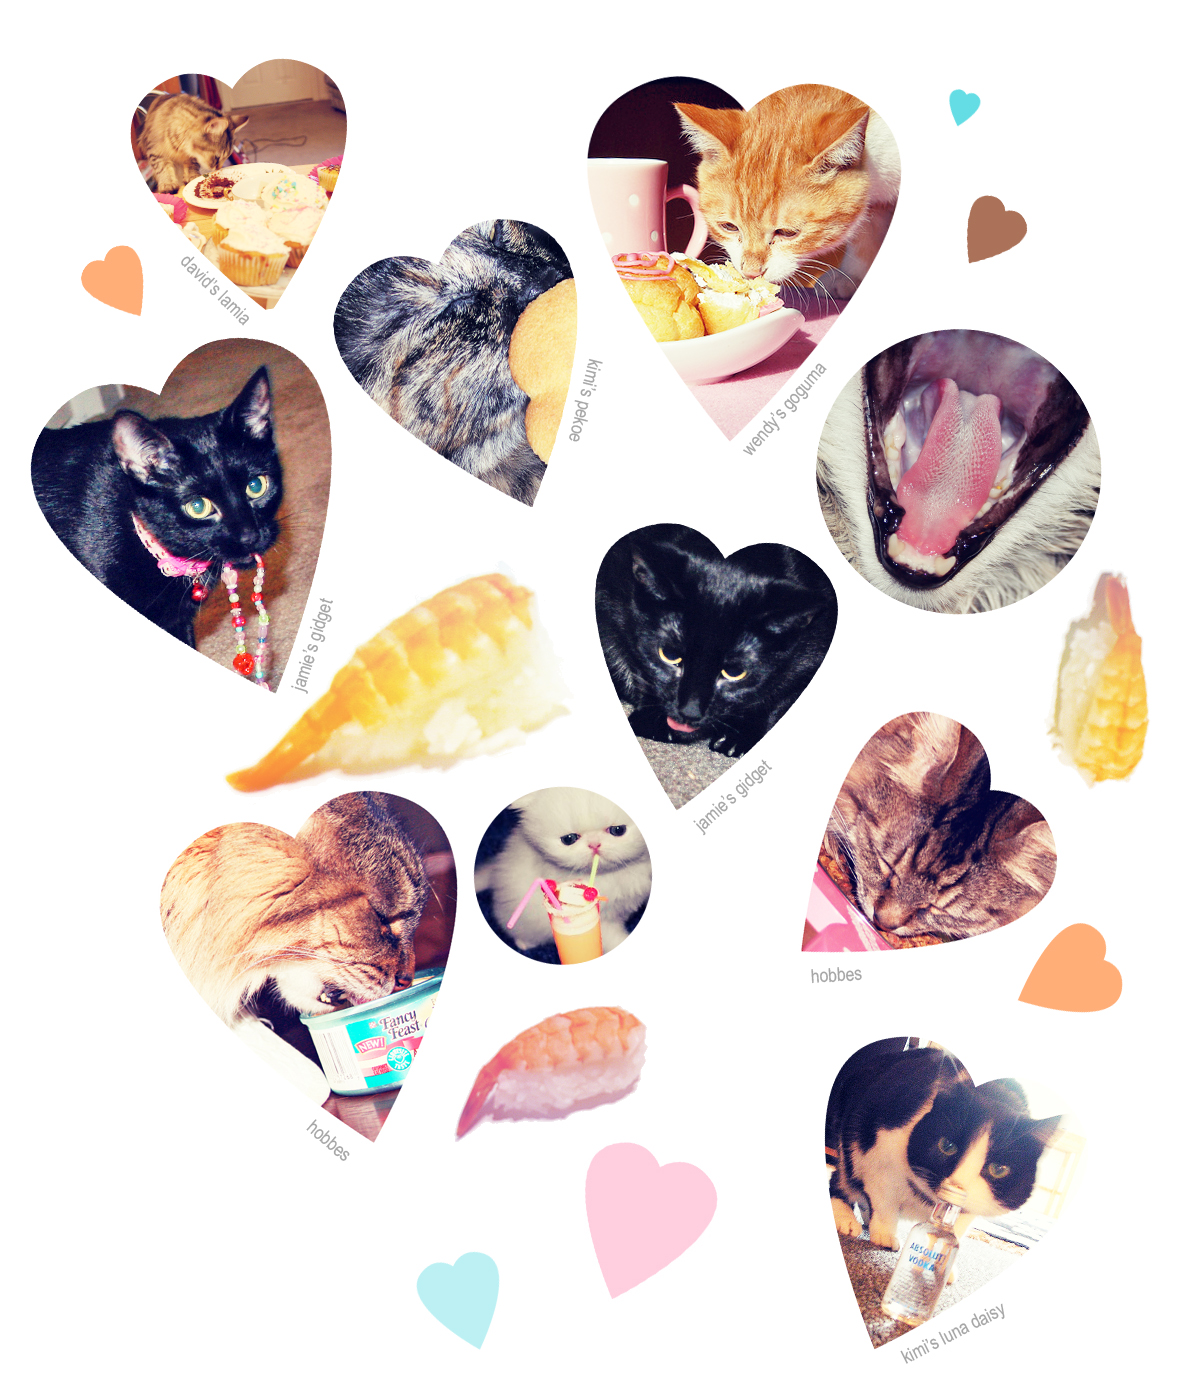
Cat and Kitten Recipes for Tea and More

08/20/2009

Worried about kitty’s food allergies? ASPCA has the word on those. Make sure you don’t use any ingredients that will harm your krazee kitty!

If you’re having a kitty party and having all the kitties in your neighborhood over, don’t. Kitties prefer having tea parties with their own families and are very territorial, especially when catnip and tuna are involved!

Kitty’s Cookies

1 cup of all-purpose flour
1/4 cup of whole wheat flour
2 tablespoons of wheat germ
2-4 tablespoons of catnip
1/3 cup of water
1/3 cup goat milk
2 tablespoons of vegetable oil
1 tablespoon of molasses
1 egg

Begin by pre-heating the oven to 350*F.
Combine the dry ingredients in a bowl (flour, wheat germ and catnip).
Combine the wet ingredients in a bowl (egg, milk, vegetable oil, and molasses.
Mix the wet and dry ingredients together and work it into a dough
Lightly flour the counter or other work surface
Remove a portion of dough and use a rolling pin to uniformly flatten the dough to a thickness between 1/8 of an inch and 1/4 of an inch.
Cut the dough into 1-inch squares using a rolling pizza cutter or a cookie cutter of your choice.
Place the cookies on a lightly greased cookie sheet.
Bake the cookies for 10 to 15 minutes, or until the cookies are crisp and lightly browned.
This recipe will make approximately 50 medium-sized cat treats.

Once the treats have cooled, gently remove them and place the cookies into several small freezer bags.

Tuna Surprise Kitty Bonbons

1 cup whole wheat flour
1/2 can tuna, in oil or 1/2 cup cooked chicken, chopped into small pieces
1 tablespoon vegetable or cod liver oil
1 egg, beaten
1/4 cup water

In large bowl, mash the tuna (or chicken). Add the flour, mixing well. Stir in the water, oil and egg, mixing well. Mixture will be sticky.
Shape mixture into 1/2-inch sized balls. Place on greased baking sheets. Press balls to flatten.

Bake at 350*F (175*C) for 10 minutes. Remove treats from oven; let sit 5 minutes and then turn treats over and bake another 10 minutes or until golden brown. Cool completely on wire rack. Store in an air tight container in refrigerator.

Tuna Pops

Drain liquid from tuna packed in spring water. Freeze liquid in small ice cube trays (cocktail ice cube trays work nicely, fish shaped from IKEA trays? double points!). Give no more than 2 cubes at 1 time as a treat. Reuse your can of drained tuna by placing in it an airtight container and covering with filtered water overnight for a second batch of tuna-pop water.

Catnip Tea

tea ball loaded with catnip
1 cup Water

Put the catnip in a bottle, pour in the water. Put the cap on the bottle,and shake until the catnip tea is green.

Preserving your Cooked Treats

Since these treats are preservative-free, they will not last forever. So to extend their lives, store them inside the freezer in several small freezer bags. As needed remove a bag from the freezer and leave it out for several hours to thaw. Once the treats are thawed, transfer into a Tupperware container for easy access and store the treats inside the refrigerator for up to two weeks.

DIY Recipes

Recipes for Chocolate Spa Night

06/24/2009

I know I’m not alone when I say that I love every kind of chocolate there is. Chocolate bars, hot chocolate, chocolate ice cream, dark chocolate, chocolate cake, chocolate chip cookies…the list of “delicious types of chocolate” is a list that never ceases.

Recently, though, I’ve become slightly obsessed with beauty products that infuse delicious chocolately-goodness! I figured that if the big stores like Philosophy and others are making their own chocolate products, why can’t I? And on that same note, why can’t you?

Here are 3 delectable DIY beauty recipes that use chocolate as their main ingredient.

Scrumptious Chocolate Facial Mask

What’s it for? Moisturizing dry skin
Indulge yourself with this sweet face mask. It serves as a moisturizing agent and leaves your skin ultra soft to the touch. Here’s what you need to gather:

3 tbs. heavy cream
2 tsp. cottage cheese
1/4 cup honey
3 tsp. oatmeal
1/3 cup cocoa powder

Combine all of the ingredients into a bowl and stir until you have a smooth and consistent texture. Get rid of any lumps and bumps!

If you have a blender it would probably be easier to mix the ingredients that way.

Once your mixture is ready to go, tie your hair up and apply it to your face. Let it set for 15 minutes. Rinse with warm water and follow with a splash of cold water to tighten your pores. Gently pat dry.

Decadent Chocolate Body Scrub

What’s it for? Exfoliating skin
This recipe yields one fierce body polishing agent! And it smells great, too! This is what you need:

1/2 cup white sugar
1/2 cup brown sugar
1/2 cup canola oil
1/4 cup powdered cocoa
A few drops of chocolate and/or raspberry fragrance oil (optional)
In a large bowl combine all of your ingredients. Mix thoroughly until the mixture is smooth and consistent in texture.

Liberally apply the contents to your body with a washcloth or loofah. Gently massage it into your skin in a circular motion while in the shower. Rinse off and feel refreshed!

*This recipe will yield plenty so there is enough for future uses! Store the remains in an airtight container. It will last for up to 6 months.

Sweet, Sweet Chocolate and Honey Scrub

What’s it for? Exfoliating and moisturizing
This is similar to the above recipe only this one incorporates a little bit of honey (which adds moisture) and uses salt instead of sugar for a less-course mixture! This is great if you are looking for a refreshing scrub-down! This is what you need:

2 cups honey
1/2 cup grape seed oil
6 tbs. unsweetened chocolate
2 cups kosher salt

First, grate your unsweetened chocolate into a medium sized bowl.

In a separate bowl, place your honey and grape seed oil until the two are blended together. Add the chocolate and salt. Mix completely until you have a texture that is smooth and consistent.

Liberally apply the contents to your body with a washcloth or loofah. Gently massage it into your skin in a circular motion while in the shower. Rinse off and feel refreshed!

*This recipe will yield 2 uses. Store the remains in an airtight container.

DIY Recipes

Super Cute Party Ideas and Recipes

06/24/2009

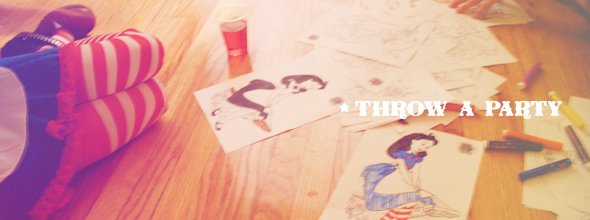
Throwing a party always sounds like a good idea when you’ve got a great theme and apt time to invite friends! When planning an adult party with friends the most important thing to remember is keep it fun, keep it going strong (until the party ends). Sometimes when several groups of friends are invited there is an awkward time period where guests don’t feel comfortable talking, make sure to serve drinks, snacks and start a fun group game or a conversation that all parties can participate in. Even if you feel your guests aren’t the crafty type, whip out some diy stations! Have a coloring section with vintage toons to bring back fond memories or a beading station. Sometimes guests simply enjoy doing things with their hands while chatting.

Themes are commonly overlooked by today’s party throwers, after all we don’t have the time of the 50s housewife to focus on every last detail. We can however design one rad party.

Try throwing a..

Craft Party

Set up numerous types of craft stations for making worthwhile goodies. Ask party goers to bring their own doodads and knick*knacks for your stations. (Hint: vintage charm earrings, mosaic frames/mirrors, water coloring desserts)

Holiday Party

For those tapped out on ideas, you could just wait for any ole holiday to roll by and throw a party in honor of it. You can do a Valentine party with pink champagne, karaoke and heart decor; or bunny-shaped mooncakes for the Chinese New Year.

Taffy-Pulling Party

A fun retro party for adults or children. Just throw in some candy-flavored cocktails and have the taffy ready for pulling after everyone arrives and gets introduced.

Saltwater Taffy Recipe
3/4 cup water
2 cups sugar
1 1/4 cups corn syrup
2 tablespoons butter
Flavoring and coloring as desired
1 teaspoon salt

Measure 2 cups sugar, l 1/4 cups corn syrup, 3/4 cup water, 1 teaspoon salt into a saucepan and blend well with a wooden spoon. Place over low heat until sugar has dissolved, stirring continuously. Increase the heat and do not stir during the rest of the cooking. Wash the sides of the pan with a brush or fork covered with muslin and dipped in water, using an upward motion. This will prevent the formation of crystals which might cause the candy to sugar. After the syrup boils put in the candy thermometer, and when the thermometer registers 265 degrees, remove candy from heat. Add 2 tablespoons butter and stir very gently. Divide the taffy into three parts; you’ll add different flavors and coloring to each one during the pulling process.

Drive-in Party

Bring snacks, grill-out, set out picnic blankets and lawn chairs and prepare your projector for a private, friends-only outdoor screening. Try a creepy, crawly horror film while camping!

Disco Party

Dressing the part is a must, dig out your soul train collection and project it onto the wall or play it in your tv set, think dark, lights, glitter and mirrors to create a disco fantasyland. Skates can be optional if you don’t have carpet hiding your floors. The only thing better than disco is roller disco.

Costume Party

Theme it over a certain costume, such as a Marie Antoinette Cocktail Party, or allow all costumes.

Tea Party

Have many assorted pots of tea and teacups of all shapes and sizes everywhere, guests should have the option of trying whichever tea they like! Be sure to have sugar cubes and cream available for the sweetie lovers. Scones, cupcakes, tartes and tortes are musts. Do not skimp, break out the strawberries and chocolate. Litter the table with champagne glasses and raspberries and break out the champagne and dessert wine if the tea party continues into the evening.

trois tea

Psychedelic Party

Trippy records, shag rugs, motion lamps and colorful lights. View some vintage cartoons about dreamland and take a walk outside through the neighborhood. Live near any parks or beaches? They might be fun to explore with friends.

Bring-Along-Pets Party

This could be fun or horrible! It all depends on your small ones. Make sure there is ample food and water around, keep it specific to one type of animal such as cats, small dogs or large dogs (would be best in the backyard or at a local dog park).

Funny Hats Party

For those that aren’t ready or willing to commit to a full-costume party. You can also have a 40s Hat Party, a Tacky Brooch party, etc.

Masquerade

Require masks upon entry or make masks upon entry. Use classical music and offer whimsical, fantastic foods such as magical candied apples and Absolut Raspberri Royals.

Absolut Raspberri Royal
1 Part ABSOLUT Raspberri
3 Parts Champagne
Raspberry

Add all ingredients into a chilled cocktail glass. Garnish with 3 whole raspberries.

Similar Hobby Bring-Along Party

Collect anything that would constitute a fun party? Think Blythe dolls, sweets and cameras!

Mod Party

Keep everything mod and chill. The recipes, music, party wear, everything.

Any theme you select simply do a bit of searching on.. say I’m going to throw a 80s party then I’m going to find a good selection of 80s toons, 80s movies, similar themed-foods, activities, decor, music, etc. Do a bit of research on the topic you chose (a Fairy Tea Party!) and find ideas for food and decor.

The possibilities are absolutely endless.

DIY Recipes

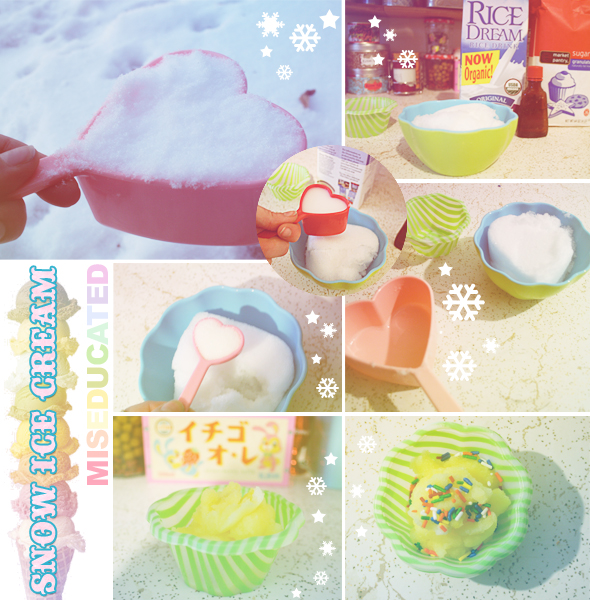
How to Make Snow Ice Cream

06/02/2009

So snow isn’t exactly a delicacy and possibly the snow you’ve seen around is a bit too dirty to shove into your mouth, but if you have had snow ice cream you know what the fuss is about! It has a sweet, creamy, delicate flavor and if you’re craving the ice cream and have no snow, you may simply try finely shaved ice. This recipe is a very old favorite of mine I’ve always made when given an abundance of clean, white snow.

All you need to start a delicious, homemade-tasting snow ice cream is a scoop of snow or shaved ice. Try one cup for a small sundae serving.

Snow Icecream

Snow Ice Cream

1 cup snow or finely shaved ice
1/4 cup milk
1 tbsp sugar
3 drops vanilla
1 drop food coloring (optional)

Mix it nicely until it is an ice cream consistency.
I make this to taste so if it’s too runny, I’ll add a bit more snow. If it’s not sweet enough or too dry, I’ll add more sugar or milk.

DIY

Copy and Paste CSS Candy Boxes

06/01/2009

Want to know how to make candy CSS borders to use with your tastee backgrounds? Feel free to use these for your website, simply credit Miseducated https://www.miseducated.com so that others can enjoy the candy. :9 Have more fun with palettes at colourlovers.com.

Sunshine Candy

Cheshire Cat

Daisy Gnome

Wizard Wand

Moonlight Moonbounce
DIY

The Chihuahua and Her Wardrobe

05/10/2009

Hello, my name’s WANWAN and I’m a little deer chihuahua.
I find that only the cutest outfits make their way into my wardrobe and I absolutely adore prancing around and playing in them. My hair is quite short you see, I’m mostly bald! I get awfully shivery without anything on! Because of my bald little body, I also just love standing on the heat vent. Whenever it turns on I hear it and trot on over pretending I’m Marilyn Monroe.

DIY

It’s getting a little chilly here in western-US so I’ve decided it’s time to whip out all of my fibers and create a little wardrobe for my Chihuahua. I’ve composed a pattern to create an easy coat for small dogs and also for cats (although my cat is a thick puffball). The front and mid section are attached by way of your choosing (buttons, snaps, velcro). You can also knit your little one a sweater. My own pattern is simply a small tube with arm holes due to my pup’s tiny size. The coats are so easy to customize! Change up your fabrics and liners, try embroidery, patches, buttons, yo-yos, bows and all sorts of cute. Thing of fun patterns, check a vintage book for inspiration! Fun coat themes include fall, daisy meadows, mushroom forests, snow, winter wonderlands, russia (nesting dolls?), snow bunnies, etc.

Wanwan’s Picks

running!Modern Tails, The Pet Boutique, Trixie & Peanut, Calling All Dogs, Paw Palace, Pooch Online, Artful Pups, Chic Dog, Bella Claires, Paws on 5th,Doggie Clotheslines, The Ritzy Rover, Pool Pup, Bella Claires, Paws on 5th, Doggie Clothesline, The Ritzy Rover, Pool Pup, Funny Fur*, G.W. Little, Haute Dog Boutique, The Haute Hound, Ezra Dog

Doggy Tip

Dogs are a little bit stinky so it’s important to bathe then only in a special shampoo formulated for your dog’s skin. Myself, being the cat person I am found the dog’s natural scent very unappealing in the beginning. After a nice warm bath in her favorite shampoo, she smells like a coconut and as her own scent comes through I find it a sweet match. 😮 She uses an organic oatmeal shampoo for dogs and cats made with aloe, vitamin e and skin-softening nutrients I picked up at the local pet store. They have aisles of pet shampoos at all major pet stores — take a look!

Crafts DIY

Create and Flavor Your Own Lipgloss

05/06/2009

Miseducated girls like to stand out in a crowd. Which is precisely why this make-it-yourself, fully customizable lip gloss recipe is perfect. (Not to mention, Miseducated-mavens always have pretty puckers).

Read through this super easy recipe and then feel free to add whatever your heart desires (within reason, of course!) to make your very own lip gloss.

creating lipgloss

You Need

Option 1 (the extra-easy route)
Have you ever applied Vaseline to your lips? Well whether you have or haven’t, it’s a great moisturizer for your puckers. If you prefer to take the easy route (which is great when you’re in a bind), can use this as your base and then customize the rest.

Option 2
Take 1 tablespoon of beeswax and place it in a clean glass jar. Place the jar in very hot water. Be careful not to get water in it as the two don’t mix well. With a toothpick or stick-like device, stir until you see that the wax has softened.

Next, add a tablespoon of almond oil. Mix thoroughly. If you want, you can add a capsule of Vitamin E which preserves your gloss for a longer amount of time and also adds nutrients. Another option is to add ½ a teaspoon of honey. This makes it a little sweeter and also adds nutrients.

If you’re a simple lassie then you can stop here. If you’re in the mood to customize, here are a few ideas to give a go:

Customize your Gloss

Fresh and Fruity
Add a few berries to your mixture while it’s hot. Crush the berries and pick out the skin or strain it. Some great berries to try are cranberries (which create a lovely shade of dark pink) or blueberries which create a pinky-tone. [Check out my Berry Beauty article which has a great Blueberry Honey gloss].

Mighty Mint
Add a few drops of peppermint or spearmint oil, mix it up and you’re set to go! Refreshing!

Cola Queen
Add a few drops of your favorite cola (try Sprite or Orange!) and mix thoroughly. Yum!

Charming Chocolate
You can either purchase chocolate scented oil or melt a little piece of chocolate with your beeswax. Guaranteed to melt on your lips! That’s a good thing.

Whimsical Flowers
Feeling romantic and whimsy? Try a little jasmine, rose or lavender oil!

Brewed Beer Gloss
That’s right! Infuse your lips with the scent of beer! Just add a few drops of your favorite brew and mix it up.

Lemon Lady
If citrus is your thing, squeeze a bit o’ lemon, lime or orange juice into your beeswax and mix thoroughly. Zing!

These are just a few ideas. Let your mind go free and you’re sure to come up with even better customizations!

*Make this gloss in small doses as it does not last forever. Store it in your fridge at night to make it last longer. Oh, and if you want to bring it out with you (a total “do”), store it in a recycled lip gloss container or even a fabulous little pill box!