Browsing Tag

craft

Crafts DIY

Inexpensive Do-It-Yourself Gifts

03/09/2009

This whole economic downturn has left a lot of the country in a sorry mess, but I’m not here to wallow in financial troubles. No way! I view the scarcity of cash as a wonderful excuse to get crafty! And it’s always more fun to craft for someone else which is what inspired me to create this article.

These gifts are easy to make and inexpensive, to boot! You can make them for a loved one “just because” or give it away for a special holiday. The choice is yours.

diy gifts

Hearty Bread and Jam

For you domestic creatures out there, put your skills to use! Everyone loves an edible gift, especially if it’s made by you! Jam/Jelly is a very easy item to make, it just takes a little bit longer than some foods. Bread and jam come in a variety of forms, so choose the best one for your recipient.

Cozy Blanket

Blankets are also very customizable, making them an ideal gift for any time of the year. Try these different types of blankets:

Crocheted – Choose your recipients favorite colors and have at it! They’ll be thrilled with the amount of time and effort you put into their present.

Tied – Buy two different types of fabric that complement each other. Make sure that you get a big enough size that it serves as a blanket. Both fabrics should be the same size. Next, spread the two fabrics on the floor (one on top of another) and cut around the edge. Each cut should be 2-4 inches deep. Next, tie the two fabrics together (double knot). Do this all around the edge of the blankets. Viola!

Customize – (an already made blanket) One of my favorite gifts from a friend was a blanket that she bought inexpensively and did stitch work on. It was thoughtful and unique!

Quilt – You don’t need to necessarily buy quilt material, but you can if you want. Choose several types of fabric that you like and cut them into squares all the same size. Next, sew them all together. Buy another piece of fabric and sew it onto the quilted part of the blanket.

Lovely Soap

I come from a very large family and some of my fondest memories are from the holidays when we would all work together to make presents for extended family members. One of my favorite things to make and give away was soap and other DIY beauty gifts.

The great thing about soap is that it’s practical and customizable. This is an easy soap recipe. (You can make your own from scratch with this recipe from www.thefarm.org) Here’s what you need — You can find all these items at your local craft store.

– Soap Block (available at your local craftstore)
– Soap Molds
– Scented oils (your choice)
– Other items for your soap (eg. Lavender, oatmeal, almonds, cinnamon, chocolate, etc.)

There are step by step instructions on the soap blocks and it’s very difficult to mess up. Melt your soap blocks, add scents and ingredients of your choice and let it sit in greased soap molds until hardened. Remove and place in pretty packages or gift baskets!

* Also get some wonderful ideas for soap from this Miseducated article.

Scrumptious Chocolate Covered Strawberries

First, buy about 5-15 healthy-looking strawberries. When you get home, make sure there aren’t any bad spots (if there are simply cut them away). Choose the prettiest ones and keep the green leaves on top – they look more beautiful that way.

While you’re at the grocery store, pick up some dip-able white chocolate. You can usually find this in the crafts section or near the produce. Also pick up some red food dye.

Melt your chocolate in the microwave in bursts of 15-20 seconds. It doesn’t take long to melt the chocolate so be sure to keep an eye on it.

Set aside some of the white chocolate and then add 2-3 drops of the red food dye to the remaining white chocolate. Dip your washed strawberries into the pink chocolate and place on wax paper. Next, dip the bottom part of a spoon/fork into the white chocolate and drizzle on top of your pink strawberry to add a decorative effect. Place in the refrigerator until they are cooled.

You can mix up the chocolate colors (ie. White dipped, pink drizzle; dark dipped, white drizzle) and place the strawberries in a sweet box. Add a ribbon and a card!
DIY Recipes

Citrus Spa Recipes for Your Skin

01/20/2009

Citrus has wonderful affects when applied topically. That’s why fruits like lemons, grapefruits, limes, oranges, etc. are often seen in DIY beauty recipes. Citrus has naturally detoxifying effects when applied to the skin and it also serves as an astringent/toner and antiseptic. The following are three original and delicious DIY Beauty recipes that incorporate citrus*y fruits into the ingredients!

citrus

Grapefruit Toning Facial Mask

This recipe is especially great for those with oily/combination skin. The citrus juices from the grapefruit exfoliates and eliminates extra oil that may accrue over the days time. Oh, and it smells great, too! Here’s what you need to gather:

1 tsp. Grapefruit juice
2 teaspoons honey
6 ounces plain yogurt
8-10 almonds
1 tablespoon rice

Once you’ve got everything together, combine the ingredients in a blender. Blend on high for 1-2 minutes. If you notice that there are large chunks of almonds left then blend again. It may help to crush the almonds pre-blending!

Wash your face with your normal cleanser and pat dry. Apply a generous amount of the mixture to your face and spread it evenly. Let it sit for 15-20 minutes or until it has hardened. Rinse with warm water. Make sure you remove everything – you don’t want yogurt residue on your face! Splash your face with cold water to tighten pores and then gently pat dry.

Cream Cheese / Orange Facial Spread

I love this recipe because if you have any left over it makes a perfect spread for a toasted bagel! It’s a refreshing, creamy blend of goodness that does wonders to your face. Here’s what you need:

1 small-medium sized orange
½ teaspoon lemon juice
1 tsp. honey
2 ounces cream cheese (soft)

In a small to medium sized bowl, combine your cream cheese and honey. Blend thoroughly so that the honey is evening dispersed throughout the cream cheese.

Next, cut your lemon in have and squeeze out ½ teaspoon of juice. Be careful of the seeds! Peel your orange so that you are left with a skinless fruit! Take 2 slices of the orange (you can peel them apart easily) and take off the thin layer of “skin.” Add the lemon juice and peeled orange slices to your cream cheese and mix/mash until you have a smooth and consistent texture.

Your spread is now ready to spread! Apply a thin layer of the concoction to your face and let it set for 15 minutes until it is hardened. Rinse with warm water. Follow up with a few cold splashes (to tighten pores) and gently pat dry!

Pineapple Papaya Acne Treatment

Again, this one is good enough to devour! Papaya is a powerhouse of nutrients and enzymes that work to heal the skin. It does wonders for acne-prone skin. The citrus*y pineapple is a gentle exfoliator and the honey/yogurt work together to moisturize. Round up these ingredients before you begin:

1 cup fresh pineapple (avoid cans)
¼ cup fresh papaya
2 grapes
½ tablespoon honey
1 tablespoon yogurt

After you’ve prepared your pineapple and papaya, take 2 grapes and peel the skin off. In a small to medium sized bowl, mix all of your fruits together, mashing them well so that you have an evenly combined mixture of delicious looking fruit. Try to not to eat any!

Next add to your bowl the honey and yogurt. Mix well and let it set for 10 minutes in the refrigerator. This gives the papaya and pineapple juices time to seep into the mixture.

While you’re waiting, cleanse your face with your normal face wash and pat dry. Next, apply the mixture to your face focusing on those areas where acne is most troublesome (T-zone, chin, etc). Let the mixture set on your face for 20 minutes. Rinse with warm water and gently pat dry. This also works well on other acne-prone parts of your body.

Mise en Snap Visual Splendor

Mise en Snap: White Oleander and DIY Inspiration

01/15/2009

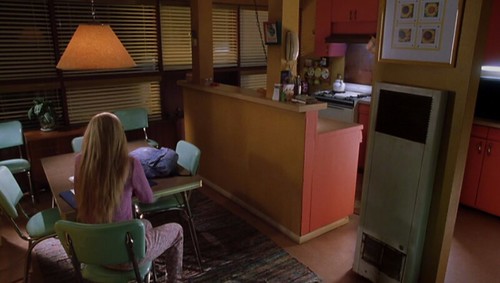
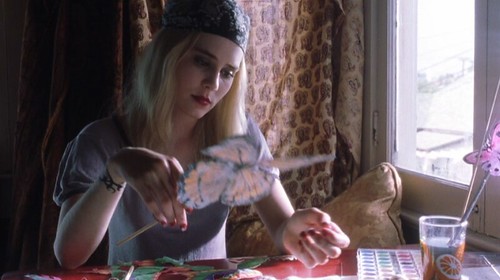
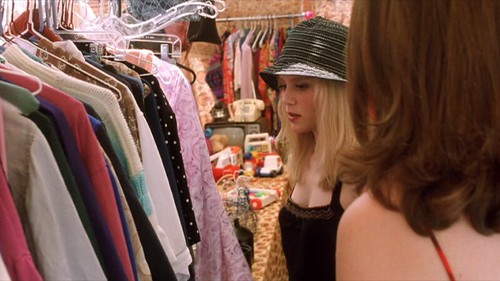
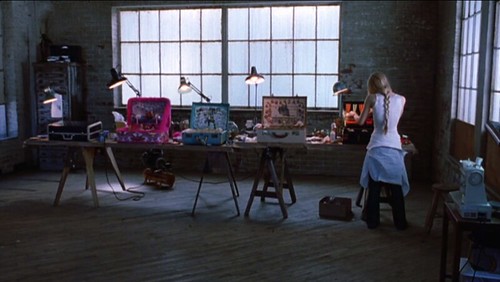
I had the luck of watching one of my favorites recently and decided to take photos of more delicious mise-en-scenes to oogle at later and to show you. This movie was originally a novel by Janet Fitch and was later -after being turned into a screen play- directed by Peter Kosminsky. Although movies from books are commonly *sniffle* trash this one was quite good and had more than a few visual gems for me to appreciate. I believe it should not remain unsaid that the lovely Alison Lohman is absolutely perfection on screen here, either, just as much perfection as Michelle Pfeiffer is (in the movie) and still just beginning to sparkle into a star. It is about how toxic a mother and daughter relationship can sometimes be.

boudoir

the kitchen

electric daisy

painting butterflies
*hint* make your own lovely goodies and sell them at a local market stall 😮

market stall

market

suitcase art

Suitcase your Memories

movie inspiration
The character’s suitcase art was really interesting to me as well, they were almost like collages and memory jars as an art form within old suitcases. Why not try to find a cheap, old suitcase at your local thrift store and create a very large sort of locket of a favorite memory or time in your life? Add scraps from it, sketches, drawings, everything you don’t want to lose. Decorate it with colors, patterns, words, letters, paintings, textures.. open it and put these special items on display whenever you’re feeling nostalgic rather than keeping them tucked into a jewelry box and rarely admired.

Design Your Life

On Being Miseducated for Life

01/03/2009

Sure, why not. So the word LIFE is a little loaded, or scary, or both. A lifestyle and way of living… that’s really a bizarre thing for women to grasp sometimes. When you wake up a little hungover and your mascara has smeared across your pillow, is that a lifestyle? We’re not all mothers, homemakers, students, wives, career-driven, party girls, crafty mavens, so why accept Miseducated so freely into our life and mantras? Well don’t unless you feel you’re a little conventionally different, your lifestyle is a little odd but that’s what makes it rad.

There is no necessary reason to sprinkle the table as well as your cocoa. There is no need for a tiny, pink lamp that releases such a faint fairy glow so that you can hardly see your hand in front of your face at night. These are the lovely pieces that nestle within your life, they add a sense of nostalgia, whimsy and they make you smile.
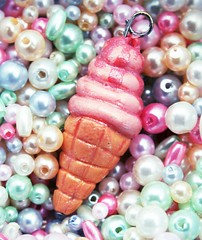
Now, some tips for making your life and your home a little bit more Miseducated whilst in the lifestyle battle of deciding what you’ll do once you actually have clean laundry…

Miseducating your Life Tips

When you finish making your cocoa, whether pink or not, top with a few sprinkles. Add more happy hues into your world where they are sparse. Colors affect your mood but it doesn’t mean a little more here and there isn’t perfectly acceptable. I’m telling you it is.

Before bed and after a bubble bath or shower, grab some of your favorite scented lotion and rub it all over your body excluding your face! Keep a bottle in your night stand for just this purpose. While you sleep your body sweats and leaves the scent behind, your bedsheets however will smell like your favorite delicious lotion when you jump in next!

When choosing home decor don’t stick with safe, muted colors. Choose your favorite colors, choose bases you feel comfortable with, such as black and white or chocolate brown, and add accents of your favorites everywhere. Each and every table, shelf and desk are stylized scenes you have created, feel free to nestle glass bottles of your colors and candles, knick knacks. Hit the antique shops or your local thrift store for some unique, inexpensive finds.

Hide tiny positive fortunes (from fortune cookies, of course!), pictures and notes in numerous, unexpected places around your home. You’ll find these and smile later.

Remember, your creativity can only be expressed by you. Stay tuned for more nonsensical tips in the future.

Crafts DIY

Easy, Colorful Jewelry and Plasticandy Bracelets

11/10/2008

I guarantee if you enjoy making cute, simple items this has been or will become your new favorite hobby. Preferably when drinking, relaxing, listening to records grab out your big bowl of pony beads and plastic jewelry bits. Grab some elastic cord, elastic string, invisible elastic, etc~ make sure it’s stretchy and not annoying to work with. Go to a craft shop and look in the bead/jewelry section to find a selection of elastic cord. Double stringing the bracelets is also a great idea if you’re rough on your jewelry!

starbrights plasticone

Next, pick out a color scheme or shapes you like and string the beads onto the double cord. When the beads are on the cord long enough that you can easily wrap it around your wrist with no spaces between beads, Tie it. Tie it very secure and then dab a drop of clear nail polish or super glue on the knot and let it dry.

After it’s dry put the bracelet on or give it to a friend (ideal). Deck your arms out in your best ones when you’re going out to a fun club, party or rave for the night and hand out bracelets to friends and people you meet. You’ll find that when you go out and have fun you’ll usually come home with one or no bracelets. Now it’s time to make more!